Temporal
Hardware with Arduino & JavaScript

3 hours
CC

Course Description
Explore the joy of hardware hacking and bringing your JavaScript skills to the physical world. Learn the Arduino platform, from wiring up LEDs, buttons, and various sensors. Manipulate your creations with web sockets and fetch requests while harnessing real-time data from the outside world sensor data. Tie the physical and digital worlds together, and see what's possible with hardware and JavaScript!
Preview
Course Details
Published: September 26, 2023
Rating
Learn Straight from the Experts Who Shape the Modern Web
Your Path to Senior Developer and Beyond
- 300+ In-depth courses
- 24 Learning Paths
- Industry Leading Experts
- Live Interactive Workshops
Table of Contents
Introduction
Section Duration: 12 minutes
 Steve begins the course by introducing the Arduino platform and talking through some third-party libraries that add support for JavaScript. Alternative boards which are compatible with this course are also discussed.
Arduino Basics
Section Duration: 48 minutes
 Steve tests the Arduino board with a "hello world" example. The Arduino is connected to the computer, and an example blink program is loaded, causing an LED to blink on and off.
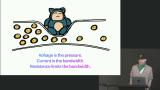 Steve explains a few electrical engineering concepts, including Ohm's law, polarity, and resistors. A color-coded chart is shown, which helps identify the ohm value of a resistor.
 Steve introduces the breadboard, which allows circuits to be wired without soldering. They are helpful for prototyping. Students are then instructed to wire a single LED and resistor to the breadboard. Use the wiring diagram linked below.
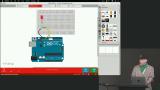 Steve loads Firmata onto the Arduino, allowing the board to be controlled by JavaScript. A basic JavaScript program is written to blink the LED. The code is executed with Node.js, and the commands are sent to the Arduino.
 Steve uses the pulse method to demonstrate Pulse Width Modulation. Digital pins simulate pulsing or fading by rapidly sending on/off signals.
 Steve adds a button to the circuit that logs messages to the console when pressed. Pressing the button completes the circuit and sends the voltage to a pin. Use the wiring diagram linked below.
 Students are instructed to modify the code so the button controls the LED light.
Communicating with a Web Server
Section Duration: 31 minutes
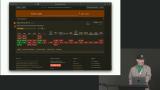
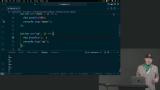 Steve uses an Express server to read data from the Arduino. The Express server uses the Johnny-Five library to access the Arduino board. When the webpage is loaded, it checks to see if the button is pressed.
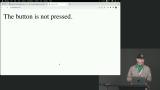 Steve challenges students to write the code to toggle an LED from the browser. The code is then moved to a client-side application, and a button is coded to toggle the LED using a POST request.
 Steve creates a web socket connection, allowing the Arduino to communicate directly with the web server without relying on GET or POST requests. When a message is received through a specific channel, the text in the browser is updated.
Sensors & Actuators
Section Duration: 40 minutes
 Steve introduces the potentiometer sensor, which emits values as a knob is turned. By default, the values are between 0 and 1023. The potentiometer is added to the breadboard with the other examples. The diagram linked below displays the individual wiring for the potentiometer.
 Steve uses the potentiometer sensor to change the background color of a web page. Since the color values are between 0 and 255, the scale method adjusts the minimum and maximum values emitted by the potentiometer.
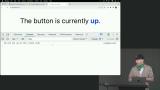 Steve uses the photoresistor to detect ambient light values from the room. The client code is refactored to adjust the browser's brightness based on the room's brightness.
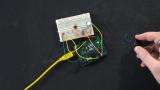 Steve wires a piezo to the Arduino, which can detect vibration and create sound. Once the piezo is wired up, notes are sent to the play method, and the piezo plays the sequence.
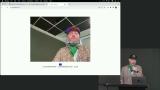
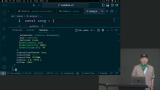 Steve uses a face detection library to track the position of the user's head. A frequency is generated based on the work so the user can play higher and lower frequencies by moving their head.
Further Exploration
Section Duration: 44 minutes
 Steve wires a color LED into the breadboard and updates the application to change the color of the LED based on the user's expression. Note: Ensure the LED uses PWM (~) pins in the breadboard.
 Steve asks students to wire an LCD screen to the Arduino. Once the LCD is wired and configured, the cursor method can move locations on the screen, and the print method will write a message at that location.
 Steve imports the "systeminformation" Node module and demonstrates how system information can be displayed on the LCD screen. Memory usage and battery percentage are two of the statistics shown.
 Steve connects the Arduino with a GitHub webhook. An Express server is created, and ngrok is used to expose the server and the port to be called from the webhook when the repo is starred.
 Steve introduces the Web Serial API and demonstrates how the web browser can communicate with serial devices without a web server as an intermediary.
Wrapping Up
Section Duration: 3 minutes
 Steve wraps up the course by sharing a few additional Arduino project ideas.
Earn a Completion Certificate
After completing this course, you'll receive a certificate of completion that serves as proof of your achievement, showcasing your expertise, and commitment to professional development. You can easily share this certificate on your LinkedIn profile to highlight your new skills and demonstrate continuous learning to potential employers and professional connections.