BUCK
Game Development with Unity for Web Developers

4 hours, 27 minutes
CC
Course Description
Learn the Unity game engine from a web developer who transitioned into full-time game development and is now a lead Unity dev! You'll go from installing Unity all the way to making a complete video game. Use the C# programming language to make a simple physics sandbox and handle user input. Then add UI, materials, lighting, and post-processing effects. Finally, learn to compile your game to many targets, including WebGL, which makes your game work natively on the web!
Preview
Course Details
Published: May 24, 2022
Rating
Topics
Learn Straight from the Experts Who Shape the Modern Web
Your Path to Senior Developer and Beyond
- 250+ In-depth courses
- 24 Learning Paths
- Industry Leading Experts
- Live Interactive Workshops
Table of Contents
Introduction
Section Duration: 8 minutes
 Nick Pettit introduces the course by providing some personal background in game design and development. An overview of the course agenda and a demonstration of the completed Unity game are also provided in this segment.
Setup
Section Duration: 36 minutes
 Nick discusses the various applications of Unity, including AR/VR product demos, film and animation, automotive, manufacturing, architectural visualization, and training simulations. A demonstration of installing the Unity Hub, Unity Editor, creating a new project, and opening the pre-made stater project is also covered in this segment.
 Nick walks through Unity's UI and discusses each section's applications, including projects, scenes, consol, layers, layout, and hierarchy. A demonstration of Unity's UI rearrangeable layout and how to revert the layout to default are also covered in this segment.
 Nick demonstrates utilizing Unity's package manager to expand on Unity's default functionality and discusses the Unity Ecosystem. The Unity Manual, scripting API, asset store, community, and Unity services are covered in this segment.
Scenes
Section Duration: 29 minutes
 Nick discusses scenes as assets that contain all or part of a game's content, GameObjects as building blocks for scenes in Unity and a container for components, and components as C# scripts that can expose modifiable values in the inspector. Students' questions regarding what IDE works well with Unity and if Unity is cross-platform compatible are also covered in this segment.
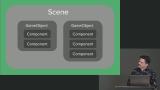 Nick demonstrates the composition of a scene in Unity and briefly walks through various actions that can be performed on scene objects, including transform.
 Nick walks through setting up the initial in-game objects, including changing the camera view, adding new objects, editing an object's location, and scaling objects. Students' questions regarding if meters are the only unit of measurement used, if there is a common object naming convention, and if game objects are classes are also covered in this segment.
 Nick demonstrates adding components to the Player GameObject including Rigidbody and PlayerInput. Brief discussions regarding mass, drag, interpolation, and input actions are also provided in this segment.
Components
Section Duration: 44 minutes
 Nick discusses using custom components such as a RollingMovement component to modify the behavior of the GameObjects in the Scene and the C# variables involved in the script. A student's question regarding if it is better to use the Unity input object instead of hard coding the key inputs is also covered in this segment.
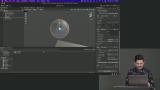 Nick live codes a RollingMovement script that will be used to apply the start, reset, and fixed update positions of the sphere objects. A Vector3 is a three-dimensional vector with three floating-point values that can represent a position or magnitude.
 Nick walks through creating a PlayerMovement script to read direction input from the player in OnMove() and applies it to the RollingMovement component. Composing multiple components instead of having one larger component allows for more complex behaviors and reusable code.
Game Objects
Section Duration: 54 minutes
 Students are instructed to write a method that resets the score value and another method that increments the score value.
 Nick walks through the solution to the score exercise.
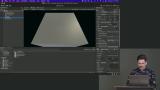 Nick demonstrates creating a collectible that increases the score when a GameObject physically intersects it. Implementing a respawn behavior for the collectible is also covered in this segment.
 Nick answers students' questions regarding what happens if the collectible does not have an implemented score method and if there is a formatter or linter for Unity code. How transform is being accessed in the Collectible file and if GameObjects are always a class of MonoBehaviour are also covered in this segment.
 Nick demonstrates how to create a game manager to control high-level aspects of the game's loop, including starting the game, updating the timer, and ending the game. The game manager can track and control the game start, level initialization, game over, restarting, scores, and timers.
 Nick walks through adding the functionality to restart the game once it has ended.
 Students are instructed to add a Y-height check to RollingMovement to check if the player or opponent has fallen off the board.
 Nick walks through the solution to the sphere exercise.
UI
Section Duration: 28 minutes
 Nick discusses the different types of Unity UI, including overlay, camera, and world space. A walk-through of adding the base for the timer, game over text, player score, and opponent score UI is also covered in this segment.
 Nick demonstrates how to implement the ability to update the game timer, player score, and opponent score in the previously created UI. Displaying responsive end game text and hiding game over text on a new game are also walked through in this segment.
Component Composition
Section Duration: 40 minutes
 Nick walks through implementing a targeting AI to allow the opponent to move around the board and collect collectibles.
 Students are instructed to create a script component called CameraMovement that attaches to the camera GameObject and moves the camera gently to frame the action.
 Nick walks through the solution to the camera movement exercise.
 Nick demonstrates adding materials to game objects to determine how they should look when rendered. A Material is an asset that combines a shader, a set of textures, and other values to partially determine how a 3D mesh should be rendered.
 Nick discusses how the lighting in Unity is intuitive by allowing the materials to access lighting data to determine an object's shading. Adding a reflection probe to capture a spherical view which is then used by shaders to generate convincing reflections is also covered in this segment.
Processing & Deployment
Section Duration: 14 minutes
 Nick demonstrates applying post-processing effects to improve the look of a game by applying full-screen effects after a frame is rendered. Bloom, tonemapping, chromatic aberration, vignette, and panini projection are a few post-processing effects
 Nick walks through deploying a Unity project to WebGL which uses PreBuildProcessing for newer versions of the macOS to point to the location of Python3.
Wrapping Up
Section Duration: 11 minutes
 Nick wraps up the course by discussing some key ideas to take away from the course. Students' questions regarding toolsets to offload asset storage, if a home screen would be a new scene or a UI view, if it's possible to access game objects with JavaScript, if the game can be prevented from restarting while running, and if the UI can be reset for varying screen size are also covered in this segment.