Instructional Designer
Web Development Project: Personal Portfolio Website

5 hours, 5 minutes
CC

Course Description
Build a personal portfolio website to solidify your knowledge of the fundamentals through a hands-on project. Implement a style guide and code responsive layouts for desktop, tablet, and mobile devices. Use the latest CSS techniques, such as CSS variables, flexbox, grid, and media queries, to create a showcase of your best work!
Preview
Course Details
Published: July 17, 2024
Rating
Learn Straight from the Experts Who Shape the Modern Web
Your Path to Senior Developer and Beyond
- 250+ In-depth courses
- 24 Learning Paths
- Industry Leading Experts
- Live Interactive Workshops
Table of Contents
Introduction
Section Duration: 4 minutes
 Jen Kramer introduces the course and explains that the goal is to build a portfolio website using only HTML and CSS. She walks through the different sections of the website, including an opening area, featured projects, projects, contact area, and footer. She also demonstrates how the website will look on different devices, such as tablets and mobile phones.
Text
Section Duration: 1 hour, 32 minutes
 Jen introduces the technology and tools that will be used to build a website. She discusses the importance of having a style guide and explain how it can help streamline the design process. She also addresses the use of CSS frameworks and emphasizes the importance of having a strong foundation in HTML and CSS. The lesson concludes by explaining the approach that will be taken to break down the website design into smaller sections and then combine them into a full webpage.
 Jen begins by explaining the structure of the HTML code provided in CodePen. She then moves on to discussing the CSS code, including the use of CSS variables or custom properties to set up colors for the webpage. She also demonstrates how to set up these variables and provides examples using different color names and hex values.
 Jen demonstrates how to use CSS to create a series of colored boxes on a webpage. She starts by explaining the concept of flexbox and how it can be used to arrange elements. She also shows how to apply flexbox properties to a parent container and style the child elements using CSS variables. Common issues and errors that students may encounter while following along are also addressed in this lesson.
 Jen guides the students through setting up fonts for their web page. She explains how to use Google Fonts to find and select the desired fonts and then provides instructions on how to embed the fonts into the HTML code using the link href attribute. This lesson also demonstrates how to define font families using CSS variables and apply them to different elements on the web page, such as the body and headings.
 Jen demonstrates how to set up a type scale using CSS. She explains the concept of root relative M (rem) and why it is her preferred unit for font sizes. She also shows how to use variables and calculations to create harmonious font sizes that can be easily adjusted by changing the base size or scale.
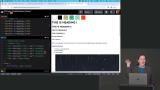 Jen explains how to apply font sizes to headings in a webpage using CSS. She demonstrates how to use variables and the font size property to set the font sizes for different heading tags. She also shows the power of using variables by easily scaling all the font sizes with a single change to the base font size or scale.
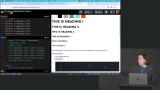 Jen walks through various base changes that need to be made to a website. She covers topics such as changing link colors and states, adjusting image sizes and alignment, and removing default margins and padding from the body element. She also explains the use of variables and ratios in CSS styling.
 Jen introduces the concept of working with text in web design. She explains the three-step process of writing content, marking it up with HTML, and styling it with CSS. The students are then instructed to fill in their own information in a provided CodePen and mark up the text using appropriate HTML tags. How to add links and how to group the content using the section element is also covered in this section.
 Jen demonstrates how to use the "container" class to limit the width of the text and center it on the page. She also introduces the concept of using the "@layer" structure to organize and hide CSS code in CodePen.
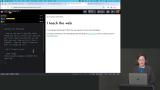 Jen guides students through adding a background image to a webpage using CSS. She starts by copying the URL of the image and then creates a new style for the outermost box of the webpage. She also sets the background-position to determine where the image should be displayed on the page, changes the text color, adds padding and margin, and makes the links more readable.
 Jen guides the students through coding the "Contact Me" section of a webpage. The students are given instructions to personalize the provided text, mark up the HTML, and add styling to the section. She provides a solution and explains the HTML markup and CSS styling used. The lesson also covers concepts such as text alignment and the use of variables in CSS.
Navigation & Footer
Section Duration: 1 hour, 16 minutes
 Jen guides the students through building a navigation bar with a hamburger button. The students start by customizing the text and setting up the links for their own websites. Jen also explains the markup for the navigation bar, including the use of header, h1, nav, ul, and li elements.
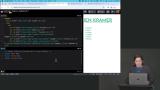 Jen introduces the concept of using Flexbox to make the navigation items go horizontally across the page and applies Flexbox properties to the ul element. She also demonstrates using Flexbox to position the name and navigation bar on opposite sides of the header.
 Jen demonstrates how to add icons to a navigation bar using SVGs from Font Awesome. She also addresses accessibility concerns by adding aria-label attributes to indicate the purpose of the icons and aria-hidden attributes to hide them from screen readers.
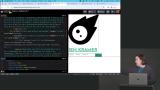 Jen continues styling the desktop navigation bar, including the font size, font weight, and the width and fill color of the SVG icons. She also mentions adjusting the navigation for tablet and mobile screens and suggests using the screen size displayed at the bottom of the CodePen to determine the optimal dimensions for different devices.
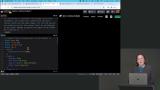 Jen explains how to use media queries to style the navigation bar for different screen sizes. She demonstrates using a media query with a max width of 830 pixels for a tablet screen and shows how to add a hamburger button for mobile screens using another media query with a max width of 640 pixels.
 Jen walks through how to display the navigation menu when the hamburger button is clicked using only HTML and CSS. Creating the animation effect and how to use `:focus` and `:focus-within` for keyboard navigation is also demonstrated in this lesson.
 Jen asks the students to build a footer for a webpage on their own. She provides instructions on how to mark up the footer and guidance on styling the footer using CSS properties like `background-color`, `background-size`, `padding`, `margin`, and `color`. Students are encouraged to add their own information, icons, and styling to make their footer look similar to the provided example.
Additional Styles
Section Duration: 57 minutes
 Jen guides students through coding the project section by setting up the HTML structure. She uses a figure element to associate an image with a caption that includes the course title and a list of skills. She also makes the image and the course title clickable by adding anchor tags with appropriate attributes and discusses the option of hiding one of the links for accessibility purposes.
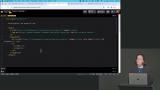 Jen guides the students through marking up the HTML and making corrections to the code. She adds CSS styles to the section, including background color, padding, text color, and image sizing. Styling the figure captions, including the background color, opacity, text alignment, and font styles is also covered in this lesson.
 Jen demonstrates how to position figure captions on top of figures using CSS grid. She explain the concept of grid rows and columns and show how to use the grid properties to manipulate the positioning of the figure and figure caption elements. She also provides additional styling to adjust the font size and margin of the captions.
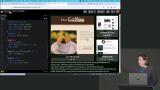 Jen is making changes to the HTML and CSS code to create a grid layout for a series of linked images. She add a div element to group the images and apply CSS styles to display the images in a grid format with equal width columns and a gap between them. She also add margin to create a visual separation between the top and bottom grids.
 Jen walks through modifying the display of a webpage using media queries to make it responsive for tablet and mobile dimensions. She demonstrates how to stack items using the display block property and add spacing between elements. She also shows how to use Flexbox to achieve a specific layout for the set of images at the bottom of the page.
 Jen instructs students to create a featured section for a website including a large image and overlapping elements. She provides a starting CodePen and recommends starting with the markup and then adding styling. A possible solution for how to structure the HTML and CSS code for the featured section, including using grids to reorder elements and making adjustments for different breakpoints is also provided in the lesson.
Detailed Styles
Section Duration: 1 hour, 13 minutes
 Jen guides students through the process of setting up their project in VS Code and provides some of the necessary images as a download from GitHub. The HTML and CSS code is transferred into VS Code and style.css and index.html are also linked.
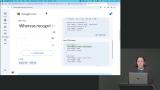 Jen guides students through embedding the fonts from Google Fonts. She also updates the image URLs in the HTML and CSS files from CodePen to the images they have downloaded from GitHub.
 Jen shows students how to preview their web page in a web browser using the "open in default browser" extension for Visual Studio Code. She also addresses some issues related to the positioning and styling of elements and provides solutions to fix them.
 Jen demonstrates how to create jagged edges on a web page using background images. It is possible to have multiple background images on the same element and Jen demonstrates how to set it up by adding the URLs of the images separated by a comma. She also discusses the importance of the order of the background images and how to set the background-repeat and position for each image.
 Jen instructs students to create the inside page for the website, including marking up the code, changing the background image, and working on their flexbox and grid skills to lay out the webpage. She also walks through a possible solution for the HTML markup.
 Jen demonstrates overriding existing styles by adding new classes to the intro and featured sections. She also explains how to adjust the width and aspect ratio of the YouTube video using CSS.
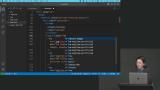 Jen demonstrates how to style the figure element with multiple images by applying grid properties to arrange the images and captions in a desired layout. She also shows how to override conflicting styles and adds additional styling to improve the appearance of the images and captions.
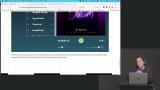 Jen explains how to address conflicts in CSS styles and increase specificity to ensure that the desired styles are applied. How to position elements using a grid layout and add a background image with transparency to a specific div is demonstrated. She also shows how to remove a background image from a specific section by overriding the previous styles.
Wrapping Up
Section Duration: 1 minute
 Jen wraps up the course by congratulating students on creating a two-page website using HTML and CSS. She encourages students to think about the story they want to tell with their portfolio and suggests swapping in screenshots, code snippets, or other elements that are meaningful to them.
Amazing course! Jen's explanation of every single point is really easy to understand.

Diego Escaño