Software Engineer & Educator
Vanilla JavaScript Projects

9 hours
CC

Course Description
Solidify your JavaScript fundamentals through practical projects! Tackle real-world tasks like implementing a dark mode switcher, creating a modal dialog component, and pull everything together into a full camera app. Throughout the course, you'll use asynchronous JavaScript, the DOM, and take JavaScript beyond the browser with Node.js. Use modern JavaScript tooling and GitHub Actions to deploy your app to the real world!
Prerequisite: Getting Started with JavaScript or equivalent knowledge.
Preview
Course Details
Published: February 12, 2024
Rating
Learning Paths
Topics
Learn Straight from the Experts Who Shape the Modern Web
Your Path to Senior Developer and Beyond
- 300+ In-depth courses
- 24 Learning Paths
- Industry Leading Experts
- Live Interactive Workshops
Table of Contents
Introduction
Section Duration: 10 minutes
 Anjana Vakil introduces the course and explains that it will cover more advanced features of JavaScript, functional programming, object-oriented programming, and working with browser APIs. Several projects will be created throughout the course to practice and reinforce the advanced concepts presented.
Review
Section Duration: 1 hour, 35 minutes
 Anjana reviews the Document Object Model (DOM) and explains how it's a way for JavaScript to understand and interact with the HTML document being browsed. Getting and setting element attributes is discussed along with handling events. The browser's console can provide some tips and warnings about working with these APIs.
 Students are instructed to implement a dark-mode toggle switch. The HTML and CSS are provided below. When the toggle switch is clicked, the value of a custom data element should alternate between light and dark.
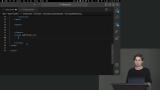 Anjana live-codes the solution to the Dark Mode Switcher exercise.
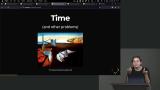 Anjana introduces the concept of time in JavaScript and explains the challenges of asynchronous programming. The browser's event loop is discussed, and examples of how it schedules tasks to ensure the browser remains responsive to user interactions are shared.
 Anjana shares examples of a few Browser APIs and recommends using MDN (Mozilla Developer Network) as a resource. The window and document objects are discussed, and the importance of exploring and understanding browser APIs is emphasized.
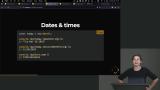 Anjana explores the Date object and its various methods for representing and manipulating time. The setTimeout and setInterval functions create delays and intervals in code execution. Questions about how the event loop handles the execution of async code, setTimeout, and setInterval are also discussed.
 Students are instructed to create a randomly moving clock. The paragraph element in the starter file will hold the current time. Random styles should be applied for the top, left, and color properties every three seconds.
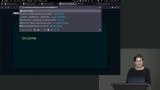 Anjana begins coding the solution to the Clock exercise. The current time is displayed and updated every three seconds.
 Anjana continues the solution to the Clock exercise. Random values are generated and applied to the displayed time using the top, left and color CSS styles.
Object Oriented Programming
Section Duration: 54 minutes
 Anjana discusses functions in JavaScript and explains how they can be used as first-class data. Higher-order functions are introduced, and an example of creating a higher-order logging function is shared.
 Anjana explains the scope in JavaScript. Closure, where a function can "remember" values from its parent scope, is also discussed. Understanding these concepts can help developers avoid unexpected behavior in code.
 Anjana discusses two programming paradigms: functional programming (FP) and object-oriented programming (OOP). Examples of both paradigms are shared and the benefits of writing code using a functional style are explained.
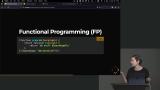 Anjana demonstrates Immediately Invoked Function Expressions (IIFE) in JavaScript. When using an IIFE, the function is evaluated and invoked immediately without needing a separate function call. They can be helpful in certain situations, such as when working with async and await in JavaScript. Pure functions in functional programming are also discussed.
 Anjana explains that every object in JavaScript has a prototype. Prototypes are the mechanism by which JavaScript objects inherit features from one another. The prototype chain can be followed to examine an object's inheritance.
 Anjana demonstrates how to access properties and methods from an object's prototype. The hasOwnProperty method can determine if a property belongs to the object or if it's inherited through the prototype chain.
Iteration
Section Duration: 20 minutes
 Anjana defines the requirements for an object to be iterable. There are many ways to iterate over objects, such as using map, for of/in loops, filter, and forEach. An object becomes iterable by implementing the iterator and the next methods on the returned object.
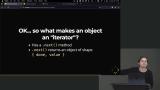 Anjana compares iterable objects with generator functions. The yield keyword in generator functions allows the function to pause and resume execution. Generator functions can be used to implement iterables, and an example of using a generator as an iterator in a for-of loop is shared.
 Anjana discusses the limitations and problems with the JavaScript Date object and mentions that the TC39 standards body is working on a new alternative to address these issues. A few additional examples of iterable objects in JavaScript are also shared.
Classes & Browser APIs
Section Duration: 1 hour, 23 minutes
 Anjana introduces classes in JavaScript and compares the syntax to other object-oriented languages. In JavaScript, the class keyword is a syntactic convenience and doesn't fundamentally change the object's behavior under the hood. Class constructors are also introduced in this lesson.
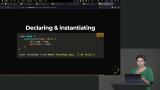 Anjana reviews the syntax for creating a class and explores other object-oriented topics, including getters, setters, method overriding, and encapsulation with private methods.
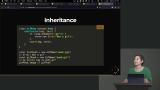 Anjana explains how to extend a class to create a subclass. The subclass inherits the properties and methods of the parent class. The super() method allows the subclass to call the parent class's constructor to run any initialization code.
 Students are instructed to create a modal dialog containing the settings for switching between dark and light modes.
 Anjana begins coding the solutions to the Dark Modal exercise by implementing the Form class constructor.
 Anjana continues the solution to the Dark Modal exercise by explaining the functionality of the submit button. The default functionality of a button with type submit inside a dialog element is to close the dialog.
 Anjana continues the solutions to the Dark Modal exercise by walking through the code in the Modal class.
 Anjana debugs and has an issue with the Dark Modal where the selected theme is not saved when the Modal is closed. This is due to the form refreshing the page on submission. The preventDefault method will prevent the refresh from happening.
JavaScript Outside the Browser
Section Duration: 41 minutes
 Anjana introduces Node.js as a way to run JavaScript outside of the browser. Developers can write JavaScript that runs server-side or in the command line. While some APIs are similar, Node-based applications can access system-level resources and other APIs not available in the browser. The Node.js REPL (Read-Evaluate-Print Loop) is also demonstrated in this lesson.
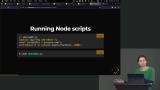 Anjana demonstrates how to run JavaScript in a JS file by creating a file and executing it with the `node` command. Differences between browser and Node JavaScript APIs are also discussed in this lesson.
 Anjana introduces npm, a tool for installing and managing Node modules in a project. npm is similar to other package managers like Yarn or pnpm. Node modules can be explored in the online registry at npmjs.com.
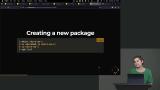 Anjana creates a new npm package using the npm command line tool. A default package.json file contains the details about the module and scripts available for running, testing, and building the project.
 Anjana modifies the package.json file to create a new custom npm script. Custom scripts are key-value pairs. The key is the script's name, and the values are the commands to run. Scripts are executed with npm on the command line.
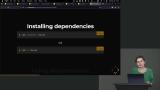
 Anjana demonstrates how to add third-party dependencies to a project with the `npm install` command. Packages are downloaded from the npm registry and installed in a node_modules directory. Any dependencies of these packages are also installed.
Modern JavaScript Development
Section Duration: 1 hour, 54 minutes
 Anjana introduces JavaScript modules and compares the CommonJS and ECMAScript syntax. When a module is imported, Node looks to see if that module is installed globally or locally in the node_modules directory.
 Anjana explains how modules can be used in a browser or Node.js applications. Browser-based applications must use the type="module" attribute on a script block. In Node.js applications, modules either need an `mjs` extension or have type="module" specified in the package.json file.
 Anjana discusses the history of JavaScript tooling and shares some advice for creating a balance between understanding the overwhelming amount of tools available today and choosing the right tools for your project.
 Anjana introduces Vite and explains why it's a valuable build tool for JavaScript developers. Vite is widely used and provides several of the necessary tools like a development server, code bundling, and a robust set of plugins.
 Anjana uses the create-vite command-line tool to scaffold a new Vite project. The tool asks a few questions about the type of project and adds the necessary dependencies to the package.json file. The dependencies are installed after the project is created and the development server is started.
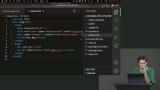 Anjana walks through the project structure and explores the generated files. Another benefit of the Vite development server is live reload, which automatically updates the application when changes are made to the source code.
 Anjana explains the Selfie Cam project, which will display video from the user's webcam in a canvas element on the page. The project will use the getUserMedia API to access the webcam and the Canvas API to draw the image to the page.
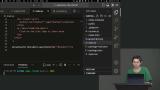 Anjana uses the Canvas API to create a graphic similar to the JavaScript logo. A yellow rectangle is drawn to the canvas element. Then, the fill color is changed to black, and the fillText method is used to draw text on the yellow background.
 Anjana begins building the selfie cam functionality. The existing application is refactored to use the getUserMedia API and add the video to a canvas element. The markup rendered by the main.js file is moved into the index.html file.
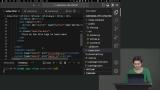 Anjana refactors the UI of the selfie cam projects so the logos appear above the space where the camera image will show. The getVideo method is exported as a module and imported into the main.js file.
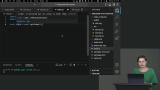 Anjana creates a drawVideo method that takes in a video and canvas element from the application. The method will draw the video image on the supplied canvas element. The drawVideo method is exported from the camera.js file so it can be imported and used in the application.
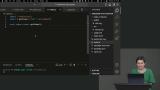 Anjana uses the exported functions from the camera.js module to display an image from the camera on the web page. The code is refactored, so the image will be displayed once the user clicks the button.
 Anjana adjusts the image displayed in the canvas element so the size matches the image from the camera. The final solution can be found in the GitHub repository linked below.
 Anjana demonstrates how to build a production version of the application. Vite will provide errors when JavaScript features incompatible with the targeted browser runtime are used. An IIFE is used to enable support for top-level await.
Source Control, Linting, & Formatting
Section Duration: 36 minutes
 Anjana introduces the "hackathon" and explains how the quick win projects from earlier in the course will be combined into an application and deployed. GitHub is also introduced and will provide source control for the project.
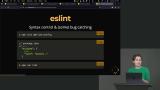 Anjana installs and configures ESLint to check the source code for syntax errors and other code problems. A "lint" script is added to the package.json file, and the lint script is also run any time the build script is run. The code in the selfie-cam repo linked below can be used as a starting point for this lesson.
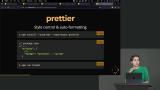 Anjana installs another developer tool, Prettier, responsible for consistent code formatting in a project. Prettier ensures any developers contributing to a project follow the same set of formatting rules.
 Anjana demonstrates the tooling provided by Visual Studio Code to aid developers in their workflow. The Source Control panel provides a basic UI for git-related operations. Extensions for ESLint and Prettier are also shared.
Deployment
Section Duration: 1 hour, 16 minutes
 Anjana compares development and production environments and shares an example vite.config.js file containing configuration for both environments. Static hosting options are also discussed in this lesson, including GitHub Pages, Netlify, and Vercel.
 Anjana looks at the configuration options for deploying a project using GitHub Pages. The finished selfie-cam repo is used as an example. Adding a YAML file to a repo's .github/workflows folder allows developers to configure custom GitHub actions for any automation tasks, including deploying a Vite project to GitHub pages. The code in the selfie-cam project linked below can be used as a starting point for this lesson.
 Anjana looks at existing GitHub actions in the project and walks through each step displayed in the log. A successful action will have a green confirmation when it's completed. Failed actions are shown in red, and inspecting the logs helps developers understand why the action failed.
 Anjana walks through the final Meme Me application, which contains elements from the quick-win projects earlier in the course and the selfie cam module. The Modal component is reused multiple times in this project. The Form module is also explored.
 Anjana continues exploring the Meme Me application. The camera module has additional functionality using setInterval to continuously update the camera image, simulating a live camera feed. A Text module has been added to draw the meme text on a separate canvas, making it more flexible when the text is updated.
 Anjana challenges students to fork the Meme Me application and add their own customizations. The customized project can then be deployed to GitHub pages. Code for the hackathon and detailed instructions for deployment can be found in the repo linked below.
 Anjana shares a few projects submitted by users during the course. If you would like to showcase your project, share a link in our Discord.
 Anjana answers questions about how junior developers can continue to grow their skills and shares some advice for career transitions.
Wrapping Up
Section Duration: 7 minutes
 Anjana wraps up the course with a summary of the accomplishments achieved through the projects and provides some additional resources.
Earn a Completion Certificate
After completing this course, you'll receive a certificate of completion that serves as proof of your achievement, showcasing your expertise, and commitment to professional development. You can easily share this certificate on your LinkedIn profile to highlight your new skills and demonstrate continuous learning to potential employers and professional connections.

What They're Saying
I just completed "Vanilla JavaScript Projects" by Anjana Vakil on Master.dev! It was fun making the camera project in which I used Vite and used some vscode extensions like eslint which can help find some bugs. And the dark mode toggle was nice.

Amaan Abdullah
amaantheone