Temporal
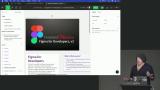
Figma for Developers, v2

4 hours, 12 minutes
CC

Course Description
Figma isn't just for designers—developers can also leverage its powerful features. Learn to use constraints, layout grids, and auto layout to build responsive designs. Explore component properties, variables, and modes to create flexible, reusable UI elements. Discover plugins that help you generate content and CSS code. Bridge the gap between design and development, collaborating more effectively when translating Figma designs into code!
Prerequisite: There are no prerequisites, but experience using design tools is helpful.
Preview
Course Details
Published: June 4, 2024
Rating
Learning Paths
Learn Straight from the Experts Who Shape the Modern Web
Your Path to Senior Developer and Beyond
- 300+ In-depth courses
- 24 Learning Paths
- Industry Leading Experts
- Live Interactive Workshops
Table of Contents
Introduction
Section Duration: 6 minutes
 Steve Kinney introduces the course by sharing his personal experience of using Figma as a front-end engineer and how it has helped facilitate collaboration between design and engineering teams. He mentions various features and concepts in Figma, such as design tokens, components, and prototyping, that can benefit both designers and developers. The majority of this course will be covered in the free tier of Figma, with some advanced features requiring a paid account.
Figma Basics
Section Duration: 39 minutes
 Steve introduces Figma and gives a tour of its interface. He explains the different sections of the toolbar, the Figma menu, and the account information. He also discusses the left panel, which includes pages and assets, and the right panel, which displays properties for manipulating layers. Steve also mentions keyboard shortcuts and the Quick Actions command palette.
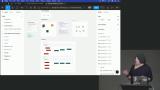 Steve demonstrates how to align and distribute objects in Figma. He shows how objects can snap into place when dragged close to each other, and how to use the alignment and distribution options in the toolbar to quickly arrange multiple objects. Steve also explains how to manually adjust spacing and use numerical values to fine-tune the position of objects. The lesson includes a hands-on exercise for students to practice aligning objects in Figma.
 Steve discusses how frames are used to group and organize elements, and how they are essential for using features like layout grids, constraints, and auto layout. He also demonstrates how to create frames using pre-sized options and how to toggle the clip content button to show or hide elements that exceed the frame's bounds.
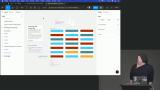 Steve explains how to use the "select all with same property" feature in a design tool. He demonstrates how to easily select and manipulate objects with similar properties, such as color, stroke, or effect. He also shows how to use the "target" feature to select all objects using a specific color and make changes to them. Students are then instructeds to practice selecting similar objects.
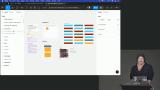 Steve demonstrates how constraints can be used to control the positioning and resizing of elements within a frame. He shows examples of different constraint settings, such as centering, scaling, and constraining to specific edges, and how they affect the layout of elements. Practical examples of how constraints can be used to create responsive designs are also provided in this segment.
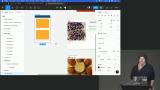 Steve guides the students through implementing responsive behavior in a web page design using constraints in Figma. He starts by setting constraints for the navigation bars, ensuring that the top nav sticks to the top and the bottom nav sticks to the bottom. Then, he moves on to the image posts and explores different options like scaling and centering to make them responsive.
Layouts
Section Duration: 1 hour, 37 minutes
 Steve introduces layout grids and explains how layout grids can be used to create column and row layouts, adjust margins and gutters, and align elements within a frame. Steve also demonstrates how layout grids can be used to create reusable grids for consistent design elements such as navigation bars.
 Steve demonstrates how to create a layout grid with two columns, 36 pixel margins, and 16 pixel gutters. He shows how to add padding to the grid using either a single row and column or by adding separate rows and columns. Steve also explains how to save grid styles for future use and mentions sharing design system tokens and styles across multiple project files.
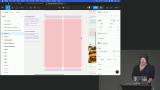 Steve demonstrates how layout grids and constraints work together in Figma. He shows an example of a website layout with two columns and a top and bottom bar and explains how to set up the grids and constraints to create a responsive layout. Steve also mentions the use of auto layout for handling edge cases.
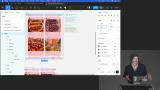 Steve explains that auto layout is similar to Flexbox in CSS and allows for easy alignment and positioning of elements within a frame. He demonstrates how to convert a frame into an auto layout frame, adjust padding and spacing, and use features like fixed width and hug contents. Auto layout can be used to quickly create buttons and navigation bars.
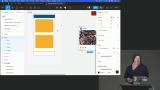
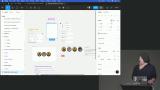 Steve instructs students to create a sidebar navigation using auto layout in Figma. He demonstrates how to create nested auto layouts to stack the menu items appropriately and adjust the spacing between them. Steve also explains how to align the items correctly and make them fill the container.
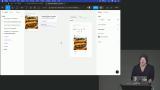 Steve demonstrates how to use nested auto layouts in Figma to create a photo card design. He starts by selecting and grouping the smaller components, such as buttons and icons, into auto layout frames. Then, he arranges these frames within larger auto layout frames to create the card layout. Steve also shows how to adjust padding and alignment within the auto layout frames to achieve the desired design.
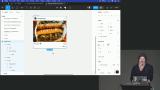 Steve demonstrates plugin called Content Reel that can be used to generate fake content for designs. He also shows how to use the plugin to generate avatars for a mock design, explaining that it can also be used to generate fake text and other types of content.
 Steve instructs students to create a navigation bar with the provided content. He demonstrates how to arrange the components, use auto layout frames, adjust spacing, and add spacers to create a responsive and flexible navigation bar. Steve also discusses different approaches and considerations for designing and implementing navigation bars.
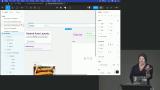 Steve demonstrates how to create a responsive component using auto layouts, min and max widths, and flex wrap in Figma. He also provides tips on organizing the components and making adjustments for different viewports. The lesson emphasizes the importance of using one component across different viewports to maintain consistency and make the designer's and developer's lives easier.
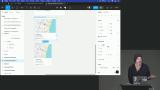 Steve instructs students to create a responsive card layout using Figma. He provides two completed examples for students to choose from or encourages them to create their own designs. Steve then walks through the process of implementing one of the examples, explaining the steps and decisions along the way. The end result is a responsive card layout that can be viewed horizontally or vertically.
Styles, Typography and Variables
Section Duration: 49 minutes
 Steve discusses using styles to reuse styling across multiple elements including colors, typography, layout grids, and effects like box shadow. He also mentions the introduction of variables in Figma, which can store values like strings, numbers, booleans, and colors. How to create and use styles in Figma, including using a plugin called Styler to generate styles in bulk is also demonstrated in this segment.
 Steve discusses various plugins and tools that can be used to generate CSS styles and variables. He demonstrates how to use plugins like CSSGen and Typescales to generate CSS classes and font sizes, as well as how to use UIColors.app to create color palettes and generate color styles or variables.
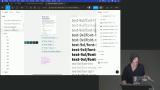 Steve introduces the concept of variables in a design tool. He explains that variables are named values that can be referenced and used in multiple places, and if the value of a variable is changed, it will be updated everywhere it is used. Steve demonstrates how to create variables for colors and numbers, and also explains how variables can be scoped to specific elements or properties.
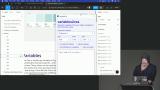 Steve explains the concept of using variables in design systems and how they can be used to create consistent values for colors, spacing, and other design elements. He demonstrates how to generate CSS variables or other formats like Sass or Tailwind variables using plugins. Steve also discusses the benefits of using variables and how they can be easily updated and applied to different design elements.
Reusable Components
Section Duration: 55 minutes
 Steve introduces components in Figma. Components are reusable pieces of UI that can be used and changed throughout a design. He demonstrates how to create a component, override properties in instances of the component, and organize components using sections and pages.
 Steve introduces the concept of component properties in Figma. He explains that component properties are similar to props in React and can be used to customize components. Steve demonstrates how to add properties to a component, including boolean properties and text properties.
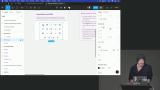 Steve shows how to create multiple components from a selection of icons and how to create an instance swap property to allow for easy swapping of icons within a component. Steve also explains the concept of variants and how they can be used to create different states of a component, such as hover or active states for buttons.
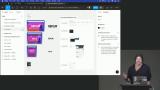 Steve demonstrates how modes allow for creating different versions of components based on different themes or states, such as light mode and dark mode.
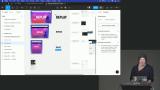 Steve shows how to create three variants of the same component, each with different typography styles for mobile, tablet, and desktop sizes. By using variables and modes, designers can easily switch between different typography styles and maintain consistency across different viewports.
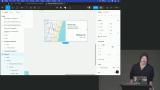
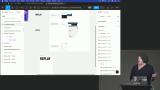 Steve briefly discusses the concept of prototyping in Figma and how it can be a powerful tool for UI design. He creates a UI mockup using frames, constraints, and auto layout. Steve also shows how to set up interactions and flows between screens to create a prototype.
Wrapping Up
Section Duration: 2 minutes
 Steve wraps up the course answering questions about color variables and exporting color schemes in different formats in Figma.
Earn a Completion Certificate
After completing this course, you'll receive a certificate of completion that serves as proof of your achievement, showcasing your expertise, and commitment to professional development. You can easily share this certificate on your LinkedIn profile to highlight your new skills and demonstrate continuous learning to potential employers and professional connections.

What They're Saying
This is the type of content I'd like to see more of on Master.dev! Thank you for providing it!

Jason Derifaj
This was excellent! Not only is the content top-notch and broken down in a way that's very easy to digest, but Steve made me burst into laughter on many, many occasions! What else can one ask for from a course!
Nicci Williams
Standing ovation to Steve Kinney for creating a great overview of Figma with his course "Figma for Developers, v2" on Master.dev! 👏 👏 👏
Just what I needed to start building my design skills again!

Ben Hong
bencodezen